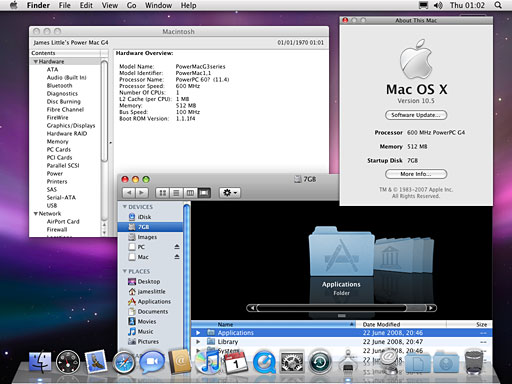
I have found that, by far, the easiest way to install Leopard on unsupported G4s is to spoof the clock speed in Open Firmware before installing. Spoofing will have Open Firmware tell OS X that your G4 is up-to-speed until you reboot. This will allow you to install without hacking an install disc or working in Target Disk Mode. You will still need to meet the 512 MB of RAM requirement, but I wouldn’t suggest using less anyway.
Without further delay, here are some instructions I have passed on to a few friends already:
Editor’s note: Every Mac and Macintosh clone with PCI architecture supports Open Firmware, so this technique should work with any Mac that could possibly run Leopard. It completely eliminates the need to hack the installer on the Mac OS X 10.5 Leopard installer DVD. Be sure your firmware is up-to-date before attempting to install Leopard. (We have a field report indicating that this hack does not work with the 667 MHz and 800 MHz DVI G4 PowerBooks – on those models, you may need to reset min-cpu-frequency and max-cpu-frequency as well.)
Note that some third-party additions to the System can prevent Leopard from booting – Unsanity’s Application Enhancer (APE) tops the list of add-ons – so you should make sure all of your software is up-to-date and may want to (or need to) disable System add-ons before installing Leopard. dk
To install Leopard on an “unsupported” G4 clocked under 867 MHz:
1. Reboot your Mac and hold down the Cmd-Opt-O-F keys until you get a white screen with black text. This is the Open Firmware prompt.
2. Insert the Mac OS X Leopard Install DVD.
3. Type the following lines exactly as shown below into the Open Firmware prompt. Be mindful of capitalization, spaces, zeros, etc. If the command is properly typed and understood, Open Firmware will display “ok” at the end of each line after you hit “return”. What these lines do is set the CPU speed reported by Open Firmware to OS X as an 867 MHz G4 processor system. They then continue the boot from the DVD drive.
For single CPUs, use the following three lines:
dev /cpus/PowerPC,G4@0
d# 867000000 encode-int " clock-frequency" property
boot cd:,\\:tbxi
For dual CPUs, use the following five lines:
dev /cpus/PowerPC,G4@0
d# 867000000 encode-int " clock-frequency" property
dev /cpus/PowerPC,G4@1
d# 867000000 encode-int " clock-frequency" property
boot cd:,\\:tbxi
4. Continue the install normally.
5. This CPU setting is only in effect until the Mac reboots. Once OS X Leopard is installed and your Mac has rebooted, the proper CPU speed should once again be displayed when you select About This Mac under the Apple menu.
This article was written by Dylan McDermond and first published on 2007.12.06. It was updated 2007.12.24.
UPDATE: The folks at iCode have taken the information from this article and used it to create LeopardAssist, a free program that automates this process and eliminates the need to fiddle with OpenFirware on your own.
Editor’s note: Some readers have noted problems booting the Leopard install disc using the above commands. If so, substitute “mac-boot” (without the quote marks) for the last line in the above Open Firmware commands. Also, if your Mac locks up hard during this process, resetting the PRAM (start your Mac and immediately hold down Cmd-Opt-P-R until your Mac restarts) should bring it back to life. dk
Further Reading
- Using Open Firmware to Install Leopard below 867 MHz, The Mac Elite. Includes info on writing Open Firmware commands to a text file so you don’t have to type them in.
Keyword: #openfirmwarehack #openfirmware #osxleopard
Short link: http://goo.gl/EhNcvo
searchword: openfirmwarehack


